Are you looking for a creative outlet that doesn’t require a kiln, complex tools, or a significant investment? Do you yearn to craft beautiful, tangible objects with your own hands, transforming simple materials into personalized treasures? If so, then air dry clay is your new best friend. This versatile, accessible medium is a dream come true for crafters of all skill levels, offering a world of possibilities without the fuss of traditional pottery. From charming home decor to unique gift ideas and even practical everyday items, the only limit to what you can make with air dry clay is your imagination.
This comprehensive guide will delve into a myriad of things to make with air dry clay, providing inspiration, practical tips, and detailed project ideas to ignite your creative spark. Whether you’re a complete novice eager to try your hand at easy air dry clay crafts or a seasoned artist seeking unique air dry clay ideas for advanced projects, prepare to be amazed by the sheer potential of this humble material.
Why Air Dry Clay? The Allure of Effortless Creation
Before we dive into the exciting world of projects, let’s understand what makes air dry clay such a beloved choice for so many. Unlike traditional pottery clay that requires high-temperature firing in a kiln to harden, air dry clay simply… well, dries in the air! This eliminates the need for expensive equipment and specialized spaces, making it perfect for DIY air dry clay creations at home.
Beyond its convenience, air dry clay offers a host of other benefits:
- Accessibility for All Ages: Its non-toxic nature and easy-to-mold consistency make it an ideal material for air dry clay for kids activities, fostering creativity and fine motor skills. Adults too can enjoy the therapeutic benefits of mindful crafting with clay, finding a calming escape in its pliable texture.
- Affordability: Generally less expensive than other types of clay like polymer clay, air dry clay is a cost-effective way to explore your artistic inclinations without breaking the bank.
- Versatility: It can be rolled, sculpted, textured, and even imprinted with natural elements like leaves, opening up a vast array of design possibilities. Once dry, it can be painted, varnished, or sealed to enhance its appearance and durability.
- No Special Equipment Needed: While some basic sculpting tools can be helpful, you can often get by with household items like rolling pins, knives, and even your own hands.
However, it’s important to note that air dry clay, while durable for many applications, is generally not waterproof unless properly sealed. This means it’s best suited for decorative items or objects that won’t be exposed to continuous moisture. For projects that require more rigidity or water resistance, a good varnish for air dry clay or sealant is crucial.
Embarking on Your Clay Journey: Essential Tips
Before you get your hands dirty, here are a few essential tips to ensure a smooth and enjoyable crafting experience:
- Prepare Your Workspace: Air dry clay can be a bit sticky. Lay down wax paper, a silicone mat, or old newspapers to protect your work surface and simplify cleanup.
- Keep Your Hands Damp: Working with slightly damp hands prevents the clay from sticking excessively and helps achieve smoother results. Keep a small bowl of water nearby.
- Work in Stages: Air dry clay begins to harden when exposed to air. For larger or more intricate projects, work in sections and keep unused clay tightly sealed in an airtight container or plastic wrap to prevent it from drying out prematurely.
- Score and Slip: When joining two pieces of clay, score both surfaces with a tool (making small cross-hatch marks) and apply a tiny amount of water (a “slip”) to create a stronger bond.
- Even Drying is Key: To prevent cracking and warping, ensure your finished creations dry evenly. Place them on a wire rack or turn them periodically so air can circulate around all sides. Drying times vary depending on thickness and humidity, usually taking 24-72 hours.
- Seal for Durability: Once completely dry, seal your air dry clay projects with a clear sealant, varnish, or even PVA glue to protect them from moisture and general wear and tear, especially for air dry clay home decor items that might see regular handling.
Inspiring Projects: Things to Make with Air Dry Clay
Now, for the fun part! Let’s explore a plethora of exciting air dry clay project ideas, ranging from beginner-friendly endeavors to more intricate designs.
For the Beginner: Simple & Satisfying Crafts
If you’re just starting, these easy air dry clay crafts are perfect for building confidence and mastering basic techniques:
- Pinch Pots: The quintessential beginner project! Simply roll a ball of clay, then use your thumb to create an indentation and pinch the sides upwards to form a small bowl. These are perfect for holding small trinkets, jewelry, or even air plants. You can create charming painted mosaic pinch pots or add unique textures.
- Coasters: Practical and customizable, air dry clay coasters are an excellent starting point. Roll out a slab of clay, use a circular cutter or a glass rim to cut out shapes, and impress patterns or textures using stamps, leaves, or even lace. Once dry, paint and seal them for functional air dry clay home decor.
- Beads and Jewelry: Creating beads is wonderfully meditative. Roll small pieces of clay into various shapes (rounds, ovals, cylinders), poke a hole through them with a skewer, and let them dry. Once hardened, you can paint them, string them onto necklaces or bracelets, or even make air dry clay earrings with jewelry findings.
- Leaf Dishes/Bowls: Gather some beautiful leaves from your garden. Roll out a flat piece of clay, press a leaf firmly into it to create an imprint, then gently cut around the leaf shape. Drape the clay over a small bowl or form it into a dish to create a unique clay leaf bowl.
- Christmas Ornaments: During the holiday season, air dry clay is fantastic for making DIY air dry clay Christmas ornaments. Roll out clay, use cookie cutters for shapes (stars, snowflakes, gingerbread men), poke a hole for hanging, and decorate with paint and glitter once dry.
Elevate Your Space: Stylish Home Decor
Ready to add a personal touch to your living space? Air dry clay offers endless possibilities for air dry clay home decor items:
- Mini Succulent Planters: While air dry clay isn’t ideal for holding water directly, you can create beautiful textured succulent planters by wrapping clay around small plastic containers or forming small pots. Add drainage holes (if using a plastic insert) and decorate with carved patterns or paint.
- Candle Holders: Design elegant or whimsical clay candle holders that complement your aesthetic. Sculpt simple cylinder shapes, create abstract forms, or even build multi-tiered designs. Just ensure there’s enough space for the candle and consider using a glass insert for safety.
- Jewelry Dishes and Ring Holders: Craft unique jewelry dishes or a charming cactus ring holder to keep your precious accessories organized. These can be simple flat trays, hand-shaped bowls, or sculpted forms like a tall finger or a whimsical animal.
- Wall Hangings and Mobiles: Air dry clay pieces can be incredibly effective for wall art. Create a moon phase wall mobile by cutting out crescent shapes and stringing them together, or make individual decorative pieces to adhere to a canvas or board for unique clay wall art.
- Vases (Decorative Only): While not truly waterproof without extensive sealing, you can create beautiful decorative vases for dried flowers or purely as sculptural elements. Experiment with different textures, coil building, or slab construction for interesting forms. A pressed flower vase by imprinting real flowers into the clay before drying can be stunning.
- Bookends: For a practical and personalized touch, sculpt sturdy bookends. These can be geometric shapes, animal figures, or anything that reflects your personal style.
Beyond the Basics: Advanced Air Dry Clay Projects
For those seeking more of a challenge, these advanced air dry clay projects push the boundaries of what’s possible:
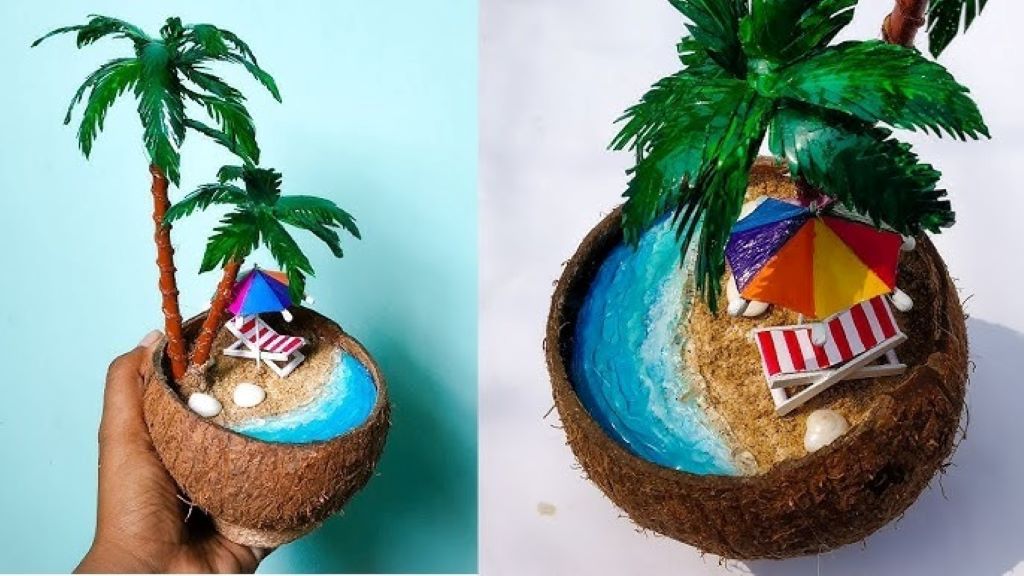
- Figurines and Sculptures: From whimsical animals to abstract forms or even portrait busts, air dry clay is an excellent medium for sculpting. Work in layers, allowing each section to dry partially before adding more to maintain structural integrity.
- Intricate Bowls and Vessels: Explore more complex bowl forms using coiling, slab construction, or even wheel-throwing techniques (though a potter’s wheel isn’t strictly necessary for hand-building). Experiment with incised designs, applied textures, or multi-part constructions.
- Lamps and Light Fixtures (with caution): With proper planning and electrical components, you can create unique lamp bases or decorative shades. Always ensure the clay is completely dry and sealed, and use low-heat LED bulbs to prevent any risk.
- Mural Art and Reliefs: Large-scale clay art projects can be created by sculpting directly onto a wooden board or canvas, building up layers to create a 3D effect. These air dry clay art projects can be incredibly striking.
- Functional Items with Inserts: For items that need to hold liquids, like a true planter or a water pitcher, you can sculpt an outer shell with air dry clay and then insert a waterproof liner or container inside.
Frequently Asked Questions (FAQs) About Air Dry Clay
Q: Is air dry clay durable?
A: Air dry clay is reasonably durable for decorative purposes once fully dry and sealed. However, it’s not as strong or chip-resistant as kiln-fired ceramics or polymer clay. For items that will experience significant wear and tear, handle with care.
Q: How do I prevent air dry clay from cracking?
A: Cracking often occurs due to uneven drying or drying too quickly. Ensure your piece dries slowly and evenly by placing it in a well-ventilated area away from direct heat or sunlight. For thicker pieces, turn them periodically. Keeping the clay consistently damp while working can also help.
Q: Can I make air dry clay waterproof?
A: While air dry clay itself isn’t waterproof, you can make your finished projects water-resistant by applying multiple coats of a good quality sealant or varnish once they are completely dry. Options include clear acrylic sealer, decoupage glue (like Mod Podge), or polyurethane varnish.
Q: What kind of paint works best on air dry clay?
A: Acrylic paints are generally the best choice for air dry clay. They offer good coverage, dry quickly, and come in a vast array of colors. You can also use tempera paints or watercolors for different effects, but they might require more sealing.
Q: How long does air dry clay take to dry?
A: Drying time varies greatly depending on the thickness of your piece, humidity levels, and ambient temperature. Thin pieces might dry within 24 hours, while thicker sculptures can take several days or even a week to fully harden. Always ensure it’s completely dry before painting or sealing.
Q: Is air dry clay safe for food contact?
A: No, air dry clay is generally not food-safe, even when sealed, due to its porous nature and the non-food-grade nature of most sealants. It’s best to use it for decorative purposes only.
Unleash Your Creativity Today!
Air dry clay is a fantastic medium for anyone looking to explore their artistic side, create personalized gifts, or simply enjoy a relaxing and rewarding craft. Its ease of use, affordability, and versatility make it a standout choice for crafters of all ages and skill levels. So, gather your supplies, find a comfortable spot, and let your imagination take flight. The world of DIY air dry clay creations awaits!
Read More:
Google Stadia: All Games will Reach the Google Streaming Service
Cloud Chaser: A new game for Android that deals with the drama of Immigration