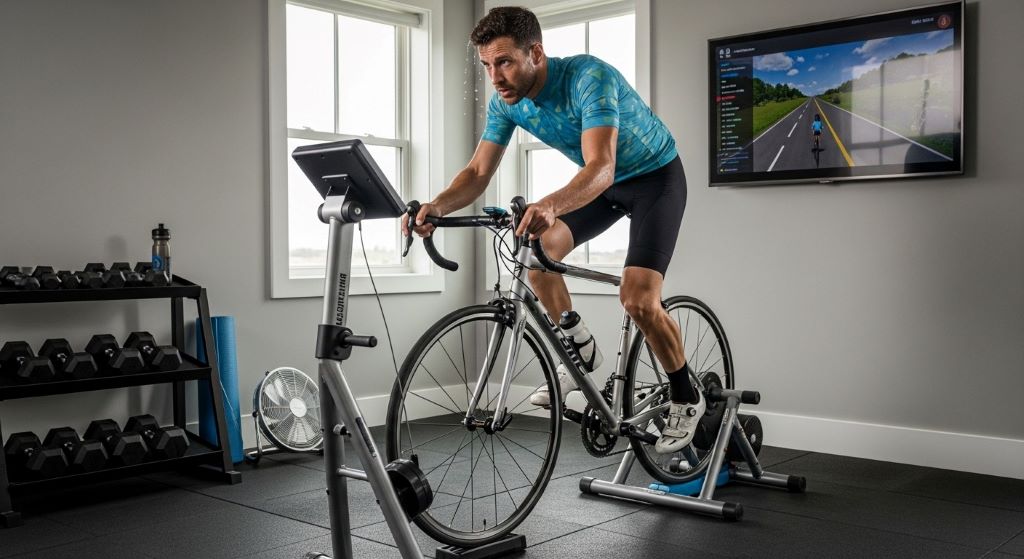
Indoor cycling has become increasingly popular among fitness enthusiasts and professional athletes alike. Whether you’re training for a race or simply staying fit during harsh weather, a bike trainer stand transforms your regular bicycle into a stationary exercise machine. This guide will help you navigate the selection process and find the perfect trainer for your needs.
Understanding Magnetic Bike Trainers
Magnetic trainers use magnets to create resistance against your bike’s rear wheel. As you pedal, the magnetic field generates friction that simulates road cycling. This technology offers a quieter and smoother experience compared to older wind or fluid trainers. Moreover, these devices have evolved significantly in recent years, providing features that were once only available in expensive smart trainers.
The beauty of magnetic systems lies in their simplicity and reliability. They require minimal maintenance and can last for years with proper care. Furthermore, they’re generally more affordable than direct-drive alternatives, making them accessible to cyclists at various budget levels.
Key Features to Consider
Stability and Frame Construction
A sturdy frame is essential for safe and effective training sessions. Look for trainers with wide bases and heavy-duty steel construction. The frame should remain stable even during intense sprint intervals or standing climbs. Additionally, rubber feet or adjustable leveling legs help accommodate uneven floors and prevent unwanted movement.
Quality trainers typically weigh between 20 and 30 pounds. While heavier units can be less portable, they generally offer superior stability. Therefore, consider where you’ll use the trainer and whether you’ll need to move it frequently.
Wheel Compatibility
Modern trainers accommodate various wheel sizes, from 26-inch mountain bikes to 700c road bikes. However, always verify compatibility before purchasing. Some models require additional adapters for specific axle types, particularly through-axles common on newer bikes. Check the manufacturer’s specifications carefully to avoid compatibility issues.
Quick-release mechanisms make mounting and dismounting your bike effortless. This feature becomes especially valuable if multiple family members share the trainer or if you frequently switch between indoor and outdoor riding.
Noise Levels
Nobody wants a training session that sounds like a jet engine. Magnetic trainers are generally quieter than their predecessors, but quality varies between models. Look for units specifically marketed as quiet or low-noise. Reading user reviews can provide realistic expectations about sound levels during actual use.
Consider your living situation when evaluating noise. Apartment dwellers need quieter options than those with dedicated home gyms. Additionally, using a trainer mat can significantly reduce vibration and sound transmission to floors below.
The Importance of Adjustable Resistance Systems
The ability to modify difficulty levels transforms a basic trainer into a versatile training tool. These trainers allow you to simulate various terrain conditions, from flat roads to steep mountain climbs. This versatility keeps workouts challenging and engaging over time.
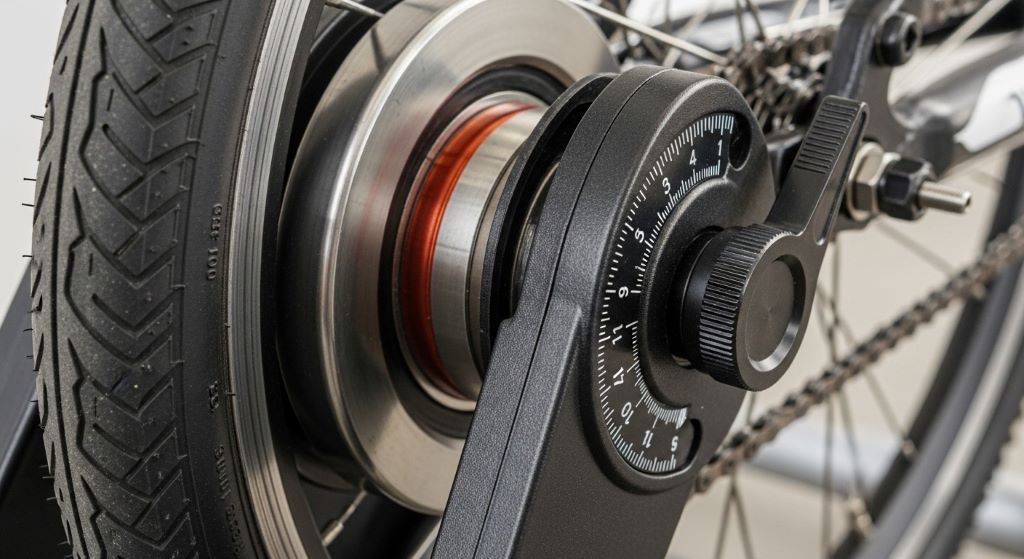
Manual Resistance Adjustment
Most magnetic trainers feature manual resistance controls. These typically come in two forms: lever-operated or handlebar-mounted shifters. Lever systems require you to reach down to adjust settings, while handlebar-mounted controls allow changes without interrupting your pedaling rhythm. The latter option provides more convenience during structured workouts.
Quality trainers offer settings that range from very easy to extremely challenging. Entry-level models might offer five or six settings, while premium units can provide eight or more distinct levels. More options mean finer control over workout intensity, which becomes important as your fitness improves.
Progressive Resistance
Some trainers incorporate progressive resistance technology. This means the difficulty automatically increases as you pedal faster, similar to real road cycling. Even at the same resistance setting, sprinting requires more effort than easy spinning. This natural feel makes training sessions more realistic and enjoyable.
Progressive systems also help prevent gear damage. They allow you to use higher gears without creating excessive strain on your drivetrain components. Consequently, your bike’s components last longer despite regular indoor training.
Matching Trainers to Training Goals
Casual Fitness Riders
If you’re cycling primarily for general fitness and stress relief, a basic trainer with five or six resistance levels suffices. Focus on reliability and ease of use rather than advanced features. A simple lever adjustment system works perfectly well for steady-state cardio sessions.
Price-conscious buyers can find excellent options in the budget-friendly category. These trainers provide everything needed for effective workouts without unnecessary complications. However, ensure you’re not sacrificing essential quality features like frame stability or wheel compatibility.
Structured Training Programs
Serious athletes following specific training plans need more precise control. Look for trainers offering eight or more distinct settings. This granularity allows you to target specific power zones and replicate varied terrain accurately. Additionally, consider models compatible with third-party apps, even if they don’t have built-in smart features.
Handlebar-mounted resistance controls become valuable during interval training. Quick adjustments between high and low intensity periods maximize workout efficiency. Therefore, this feature is worth the additional investment for dedicated athletes.
Rehabilitation and Recovery
Individuals recovering from injuries or managing chronic conditions benefit from trainers with very gentle lowest settings. The ability to start with minimal resistance and gradually increase difficulty supports safe progression. Smooth, consistent resistance prevents jarring movements that might aggravate injuries.
Consult with healthcare providers about appropriate training intensities. Many physical therapists recommend indoor cycling as low-impact cardiovascular exercise. These trainers with multiple settings provide the control needed for medical-supervised rehabilitation programs.
Installation and Setup Considerations
Assembly Requirements
Most trainers arrive partially assembled, requiring 30 to 60 minutes of setup time. Basic tools like Allen wrenches are usually needed, and some manufacturers include these in the package. Assembly instructions have improved significantly, with many companies providing video tutorials online.
If mechanical tasks intimidate you, consider purchasing from local bike shops that offer assembly services. The small additional cost ensures proper setup and immediate readiness for training. Furthermore, shop staff can demonstrate proper bike mounting techniques.
Space Requirements
Measure your available space before purchasing. When mounted, a bike on a trainer extends approximately six feet long and two feet wide. Allow additional clearance around the sides for dismounting safely. Ceiling height matters too, especially if you’re tall or prefer standing while climbing.
Foldable trainers save space when not in use. However, they might sacrifice some stability compared to fixed-frame designs. Evaluate your storage options and training frequency to determine whether portability justifies potential stability trade-offs.
Floor Protection
Trainer mats serve multiple purposes beyond noise reduction. They protect flooring from sweat damage, catch drips from water bottles, and create a designated training zone. Quality mats are worth the investment, preventing costly floor repairs later.
Mats also improve stability on carpet surfaces. The firm base prevents the trainer from sinking into soft flooring. Additionally, they’re easier to clean than carpets or hardwood floors after sweaty training sessions.
Budget Considerations
Entry-Level Options
Basic magnetic trainers start around $100 to $150. These units provide fundamental functionality without advanced features. They’re perfect for occasional use or beginners exploring indoor cycling. However, scrutinize build quality carefully at this price point.
Budget models might lack smooth resistance transitions or have fewer adjustment options. They can still deliver effective workouts if your expectations align with their capabilities. Read multiple reviews to identify which budget trainers punch above their weight class.
Mid-Range Selections
The $200 to $350 range offers the sweet spot for most cyclists. These trainers balance quality construction with reasonable pricing. They typically feature more settings, better stability, and improved noise reduction compared to entry-level alternatives.
Mid-range units often include extras like front wheel risers and better warranty coverage. These additions enhance the overall experience without breaking the bank. Therefore, this category deserves serious consideration for regular indoor training.
Premium Models
High-end magnetic trainers can exceed $400. They offer the smoothest resistance curves, quietest operation, and most durable construction. Premium models might include advanced features like electronic resistance control or app connectivity.
For serious athletes or those training year-round indoors, premium investments pay dividends through enhanced performance and longevity. However, casual riders might not fully utilize these advanced capabilities. Assess your commitment level honestly before splurging on top-tier equipment.
Maintenance and Longevity
Regular Care Requirements
Magnetic trainers require minimal maintenance compared to other types. Periodically check and tighten bolts to ensure stability. Wipe down the frame after sweaty sessions to prevent corrosion. These simple tasks take minutes but significantly extend equipment life.
The resistance unit itself is largely maintenance-free. Unlike fluid trainers that can leak or wind trainers with wearing components, magnetic systems remain reliable for years. This reliability makes them excellent long-term investments.
Tire Wear Considerations
Standard tires wear quickly on trainers due to consistent friction. Consider using a dedicated trainer tire made from harder compound rubber. These special tires last much longer and produce less noise. Alternatively, keep an old wheel with a worn tire specifically for indoor use.
Proper tire pressure also affects wear rates and noise levels. Most manufacturers recommend higher pressures for trainer use compared to road riding. Check your trainer’s manual for specific recommendations.
Warranty and Support
Quality manufacturers stand behind their products with warranties ranging from one to five years. Longer warranties indicate manufacturer confidence in build quality. Additionally, research customer service reputation before purchasing.
Replacement parts availability matters for long-term ownership. Established brands typically maintain parts inventory for discontinued models. This support ensures you can keep your trainer functional even years after purchase.
Making Your Final Decision
Choosing the right trainer involves balancing multiple factors against your specific needs and budget. Start by identifying your primary training goals and usage frequency. Then narrow options based on essential features like stability and resistance levels.
Read recent reviews from actual users rather than relying solely on marketing materials. Real-world experiences reveal practical details manufacturers might omit. Pay attention to recurring complaints or consistent praise across multiple reviews.
If possible, test trainers at local bike shops before buying. Hands-on experience provides insights no review can match. You’ll immediately feel differences in stability, noise, and resistance smoothness.
Remember that even the best trainer requires your commitment to deliver results. The perfect equipment becomes useless if it gathers dust. Choose a trainer that motivates you to ride consistently throughout the year.
Conclusion
Selecting a magnetic bike trainer stand requires careful consideration of your training needs, available space, and budget. An adjustable magnetic trainer with multiple resistance levels provides the versatility needed for effective indoor cycling workouts. Focus on stability, compatibility with your bike, and ease of adjustment when evaluating options.
Quality trainers transform indoor cycling from a monotonous chore into an engaging training experience. They allow you to maintain fitness regardless of weather conditions or time constraints. Moreover, the convenience of training at home eliminates commute time to gyms or outdoor riding locations.
Invest in a trainer that matches your commitment level and training goals. Whether you’re a casual fitness rider or serious athlete, the right equipment makes indoor cycling enjoyable and productive. With proper selection and maintenance, your trainer will provide years of reliable service.
Frequently Asked Questions
What is the difference between magnetic and fluid trainers?
Magnetic trainers use magnets to create resistance, while fluid trainers use viscous liquid in a sealed chamber. Magnetic units are generally quieter and require less maintenance. Fluid trainers often provide a more road-like feel but can leak over time. Magnetic options cost less on average and last longer with minimal care.
How many resistance levels do I actually need?
Most cyclists find six to eight levels sufficient for varied training. Beginners might manage with five levels, while serious athletes prefer eight or more for precise intensity control. More levels allow finer adjustments when following structured training plans. However, having ten levels provides little practical advantage over eight for most riders.
Can I use my mountain bike on a magnetic trainer?
Yes, most magnetic trainers accommodate mountain bikes with 26-inch or 29-inch wheels. Verify compatibility before purchasing, as some trainers require additional adapters for specific axle types. Through-axle mountain bikes might need special adapters. Check the manufacturer’s specifications to ensure your bike fits properly.
How loud are magnetic trainers compared to other types?
Magnetic trainers are generally the quietest option available. They produce 60 to 70 decibels during use, similar to normal conversation levels. Wind trainers can exceed 80 decibels, comparable to heavy traffic. Tire choice and proper setup significantly affect noise levels. Using a trainer mat further reduces sound transmission through floors.
Do I need to calibrate a magnetic trainer?
No, magnetic trainers with manual resistance adjustment require no calibration. They’re ready to use immediately after assembly. Simply set your desired resistance level and start pedaling. Smart trainers with electronic resistance need occasional calibration for accuracy. Manual magnetic units maintain consistent resistance without technological complications or setup procedures.
Related Topics:
Are BMX Comfortable: Discover the Surprising Truth
Learn to use brakes when mountain biking

